Showing posts with label recipes. Show all posts

Tuesday, January 17, 2012

Broccoli and babies!

When I say broccoli, you say _______? Gross? Yuck? No way? Those tree looking things that I haven't touched since I was five? Fake ignorance and ask what I'm talking about.

Well I used to say all of the above as well until I discovered the easiest, tastiest version of a vegetable I can think of (and still have it qualify as healthy). Let me change your life.

First things first, preheat your oven to 425. Then, you take 2 heads of broccoli (I know, from the initial looks of things, this will not result in something delicious, but bear with me.) Once you've made this, you will start to cook more than two heads at a time because it's so good, you can eat a ton of it because it's healthy, and it reheats well for lunch the next day. Just a suggestion. Ok, where I was I? Oh right, once you have determined how much you want to cook, break the head(s) in to small florets (word of the day?) I put them on a foil lined baking sheet just to help with easy clean up.


Then you take about a tablespoon of oil (any kind you like! I use sunflower oil but I've used olive oil and it works great too) and brush it onto each piece of broccoli. Make sure you get every piece, it is vital to the end result. Then take about 2 teaspoons of salt and sprinkle them all over. You can always use less depending on your preferences. This "recipe" is pretty hard to screw up and you can eyeball all of it if you are more of a go-with-the-flow person. 

Then you shove those babies into the oven for a solid 15-18 and voila

I know my pictures are lame. But you can see the difference if you look closely. See how they're a little browned?

You have a crispy, healthy, super easy, delicious side that you won't be able to get enough of. Even if you think broccoli is a four-letter word. And if Dt thoroughly enjoys this version of a vegetable, just about anyone will. Try it. Thank me later.

Original recipe can be found here

Ingredients:
2 heads broccoli, chopped into florets
1 tablespoon olive oil, or any oil you like (sunflower, grapeseed)
1 to 1 1/2 teaspoons salt

Directions:
Preheat oven to 425 degrees F. Lay the florets in a single layer on a large baking sheet.
Pour oil into small bowl and dip a pastry brush into the oil and then onto each floret to coat lightly.
Sprinkle evenly with salt.
Roast for 15-18 minutes, or until broccoli tips have begun to blacken and they can be easily pierced with a fork.

Now, in other news, I'd like to share with you a blog post that had me crying from laughing so hard. This is one of the blogs I follow and after reading this post I thought it was too funny not to share. She experiments with the "what your future children will look like" website a la How To Lose a Guy in 10 Days and the results are ridiculous! Take a look and make sure you are somewhere you can laugh hysterically without any judgement.

http://ardjla.blogspot.com/2012/01/i-did-bad-thing-today.html

I'm easily amused and if you don't find this as funny as me, I understand. 

Thursday, January 12, 2012

Red velvet cheesecake cookies

In addition to my chicken (successful or not), broccoli, and smoothies, I also made these cookies this past weekend. 

Don't these look great?

That's obviously not my picture because we've seen what mine turn out like. I found this recipe on one of the blogs I read and this is her picture (click on the link under it to see her blog). Below is my attempt at creating something that looked equally as delicious (which I don't think I achieved but they tasted great, ha!) 

I usually don't even pay attention to recipes that use box mixes (yes, I'm a snob but my grandmother and father taught me to cook and a box of cake was NEVER included!) but the blogger said that you couldn't even tell and that it was worth it. 

Ingredients

This is the batter after refrigeration. Doesn't it kinda look like a heart? So gross, but delicious when finished!

The original recipe warned about the cookies getting really big and spreading out so I cooked four at a time. That picture is of a normal sized cookie sheet so they really are huge!

This is where it got tricky, the original recipe said to drizzle the white chocolate but mine was way too thick to drizzle so I dipped half (kinda like the black/white cookies? No?)

And this was the final product. Not bad, eh?
The cookies turned out great! These were a little messy with the batter and the cheesecake but the final product was definitely worth it. If I make them again I'm going to try and figure out a different solution for the white chocolate. I will also admit that for a box cake recipe, it was very good!

Red Velvet Cheesecake cookies
Original Recipe

ingredients:

For the cookies:
1 box red velvet cake mix (I used Duncan Hines)
2 tablespoons all-purpose flour
2 large eggs
1/2 cup canola oil
1 teaspoon vanilla extract
For the cheesecake filling:
4 oz cream cheese, at room temperature *I used 1/3 less fat
2 cups powdered sugar
1 teaspoon vanilla extract
For the white chocolate drizzle:
1 1/2 cups white chocolate chips, melted

directions:


1. To make cookies, in a large bowl combine cake mix and flour. Whisk until clumps disappear. In the bowl of a stand mixer, mix together cake mix, flour, eggs, oil and vanilla extract. Mix until smooth. Wrap the dough in plastic wrap. The dough will be oily. Refrigerate for at least two hours.
2. To make the cheesecake filling, using a mixer, combine cream cheese, powdered sugar, and vanilla extract. Mix until smooth. Using a teaspoon, scoop out cheesecake filling and place on a plate. Continue scooping out cheesecake filling into teaspoon balls until you have 10. Place plate in the freezer and freeze for at least two hours.
3. Preheat oven to 350 degrees F. Line a large baking sheet with parchment paper or a silicone baking mat. To assemble the cookies, take about 1/4 cup of red velvet cookie dough and flatten in your hands. Place a teaspoon of cheesecake filling in the center and wrap the cookie dough around the filling. Gently roll into a ball and place on prepared baking sheet. Scoop onto lightly greased or parchment lined baking sheets. Only bake 3 cookies at a time. The cookies are large and will spread. Bake for 11-13 minutes or until the cookies begin to crackle. Let the cookies cool on the baking sheet for 5 minutes. Remove from baking sheet to a wire cooling rack and cool completely.
4. Melt the white chocolate chips in a microwave safe bowl or over a double-boiler. Drizzle the white chocolate over the cooled cookies. Let the cookies set until the chocolate hardens. Serve and enjoy!
Note: if you are going to store the cookies for more than a day, you may want to keep them in the refrigerator. You can make the cookies smaller. Just use less dough and filling. You want to make sure you completely wrap the cookie dough around the filling before baking-so it doesn't leak. Enjoy!

Tuesday, January 10, 2012

Turkey Lettuce Wraps

Have y'all ever had the chicken lettuce wraps from P. F. Changs? They are delicious! My mom and I have been known to make a meal out of them even though they are supposed to be appetizers (there's nothing wrong with ordering two of the same appetizer!)

Oh, we do!
Unfortunately, we don't have a P.F. Chang's here in Columbia so these are not often within my reach. Luckily, thanks to skinnytaste, I have found something to satisfy my cravings. I give to you

Unfortunately, I forgot to take a picture but this is exactly what ours looked like!

Turkey Taco Lettuce Wraps
Gina's Weight Watcher Recipes
Servings: 4 • Serving Size: 2 taco wraps  Old Points: 3 pts • Points+: 4 pts
Calories: 134.1 • Fat: 1.7 g • Carb: 9.7 g • Fiber: 2.4 g • Protein: 21.3 g • Sugar: 4.3


Ingredients: 

  • 1.3 lbs 99% lean ground turkey
  • 1 tsp garlic powder
  • 1 tsp cumin
  • 1 tsp salt
  • 1 tsp chili powder
  • 1 tsp paprika
  • 1/2 tsp oregano
  • 1/2 small onion, minced
  • 2 tbsp bell pepper, minced
  • 3/4 cup water
  • 4 oz can tomato sauce
  • 8 large lettuce leaves from Iceberg lettuce

Directions: 

Brown turkey in a large skillet. When no longer pink add dry seasoning and mix well.Add onion, pepper, water and tomato sauce and cover. Simmer on low for about 20 minutes.

Wash and dry the lettuce. Place meat in the center of leaf and top with tomatoes, cheese and salsa or whatever you prefer. (Toppings extra points)

Skinnytaste is one of my favorite blogs that I follow. She creates amazing dishes that are healthy and she lists weight watcher's points as well as nutritional facts. So helpful! And if you aren't big on the health craze, don't worry, you can still totally utilize this recipe. You can use any type of meat you want but this homemade taco seasoning is hard to beat! We enjoyed the guilt-less turkey option but I could easily cook this with ground beef for a house full of guys who could care less about diets and they would be thoroughly satisfied. They are also super easy and quick to throw together. Yum! Try it out and let me know what you think!

Saturday, January 7, 2012

Spinach Smoothies, yum!

Have y'all heard about spinach smoothies? They're great!!! Growing up, my health-crazed mother drank these things that we referred to as "the green drink." Back then, I thought it was the grossest thing I had ever seen. Mom's were comprised of just lettuce and water but they looked horrendous! Well, as I've aged and matured, I've realized that mom was right about a lot of stuff (don't you hate it when that happens?), including her "green drink." These days, I refer to my "green drink" as the "green monster" and it has a little more involved than lettuce and water.


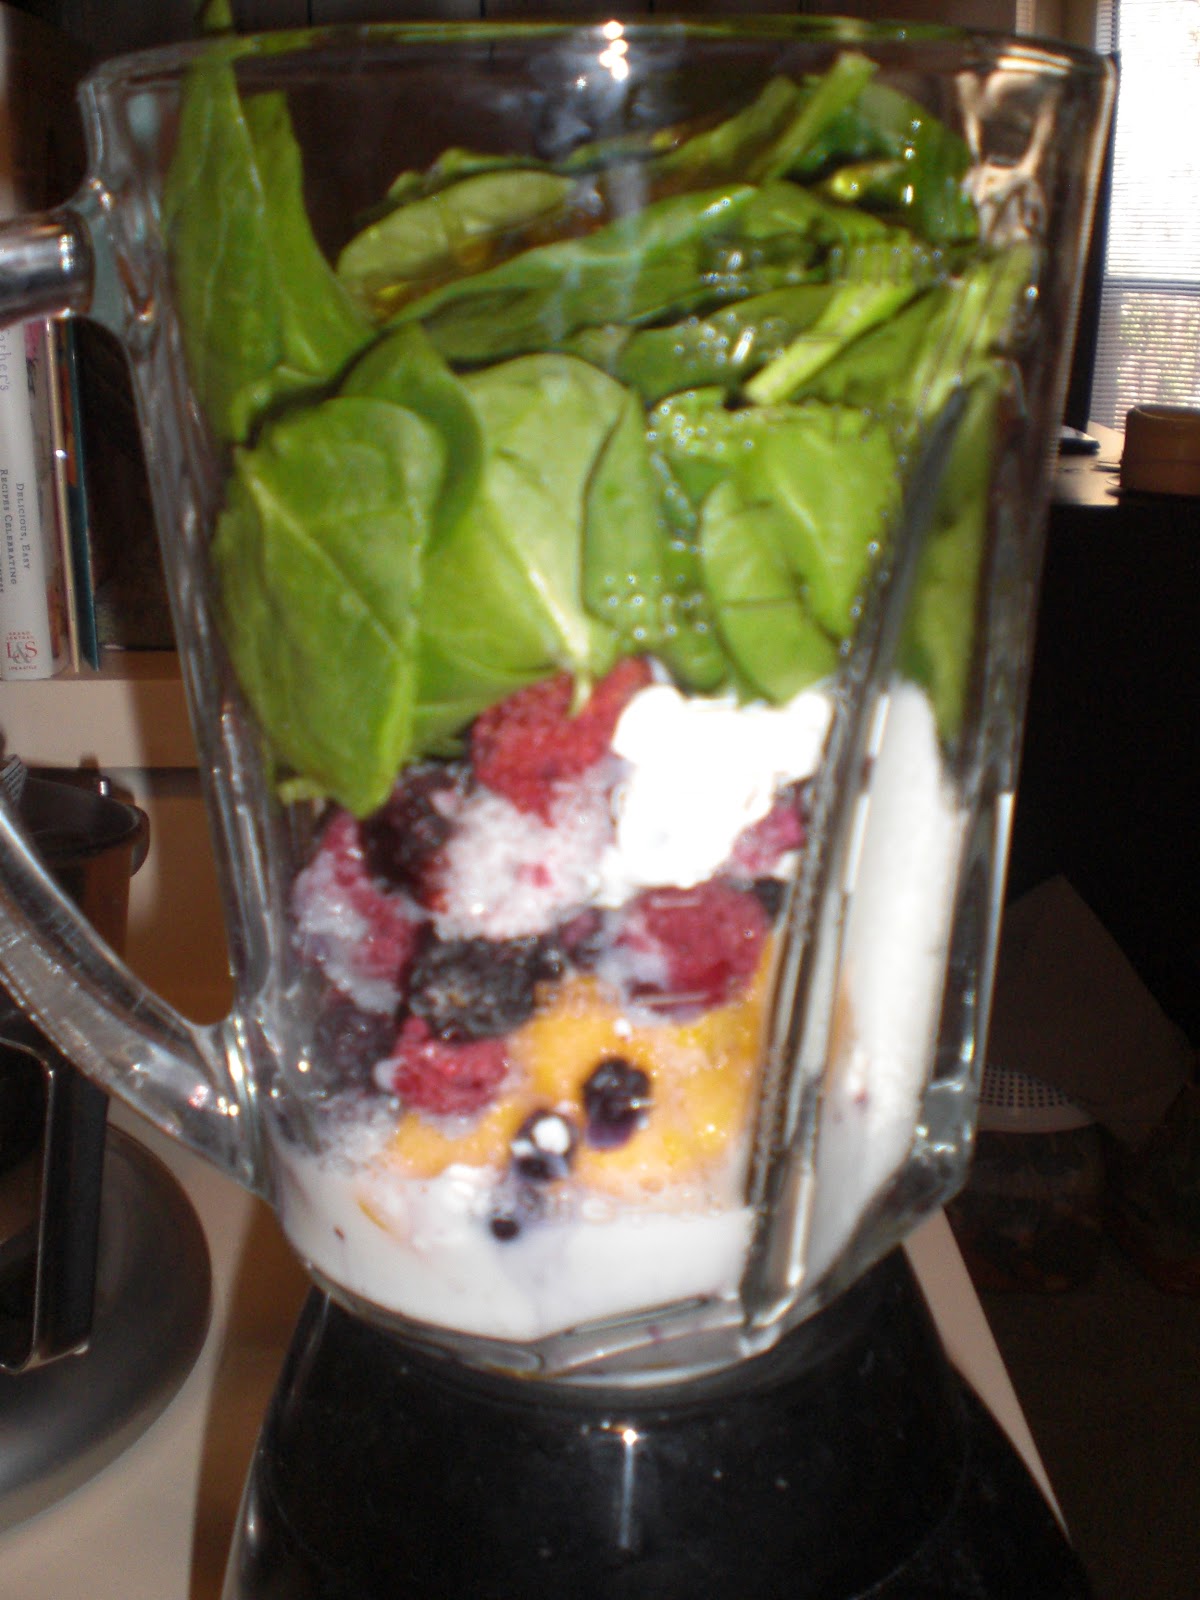
So this is what my smoothies usually consist of. Lots of fruit (I always have frozen fruit on hand because there's not telling how long my fresh fruit will last but when you do use fresh fruit I suggest adding some ice to thicken it and make it more like a smoothie), some milk or coconut water, greek yogurt (little bit of protein?), and lots and lots of spinach! Now, most people think that blended spinach would be gross, and the thought of it is, but you actually can't taste the spinach at all! It tastes just like a normal fruit smoothie but with a really fugly green color. I always shove as much spinach in there as possible because I think this is the easiest way to get a few extra servings of my daily fruit and vegetables. 


This is what it looks like before blending. Sometimes I add a little honey to make it sweeter or some flax seed. You can throw just about anything in there but remember that the more honey and non-veggie/fruit things you put in there, the less healthy it becomes...


This is the blended product. In the picture it looks nice and pink and pretty but in reality, it was dark purple/brown. But just picture it as this lovely normal color so you'll be more likely to drink it!


One spinach smoothie, size large! These make a great snack or breakfast and are full of veggies, fruits, and nutrients!

Let me know if you try it!

Tuesday, January 3, 2012

Shrimp, feta, and fresh herb mac and cheese

As you may or may not have previously read on this blog, I love to cook! Now, you may be wondering, why hasn't this girl talked about cooking at all even though she's a self professed foodie? Oh, well, that's because my retail job took over my life during the month of december and I didn't get around to cooking anything fun or much less document it. Fortunately for you, me, and Dt's appetite, my job has slowed down tremendously so I have time to mess around in the kitchen again! Woooo!

So this is a recipe that I found on Pinterest and decided that I would try it. Dt is a huge fan of mac and cheese and shrimp so I thought this would be a good way to combine the two and adult-ify it!

This is the picture that caught my eye on pinterest.
Unfortunately, my pics look nothing like this. Courtesy of  Annie's Eats


The ingredients, pretty simple!
So the ingredients are all really basic and easy to find. When possible, I substitute low-fat, fat-free, or wheat ingredients. The original recipe just calls for milk and pasta. I used organic skim milk and whole grain pasta but that's just my preference, def not required. In the past, I have found recipes where you need to use regular ingredients or the recipe doesn't work, but I found out this was not one of them. This dish also disguises the whole grain pasta if you have picky eaters or boyfriends who don't like anything but normal pasta. 

Also, do you see that huge bunch of parsley off to the left? Does anyone else hate buying that huge bunch just to throw 1/2 of it away? It only costs $.99 but it still feels wasteful because no recipe calls for 5 cups of parsley and I don't use it in every day life. Anyone have any suggestions so I feel less like a wasteful person? Hmpf.


This was prior to cooking. It looks really blah and white but that's probably because of my horrible camera. I apologize for all of these pictures because I am not a photographer or in possession of a baller Nikon. 

Hungry much? Ha!

So this is the final product minus a serving. Oops! We may have gotten carried away and forgotten to take a pic before serving up. Whatever, you get the picture and you get to see what the deliciousness looks like inside (even though it looks really gross...). Overall, this was a huge success! We paired it with large salads and it was super filling. The shrimp were actually done perfectly which I was pleasantly surprised with because I was worried they would get overcooked in the dish but they didn't. I'll def be making this one again.

You can find the original recipe here but I've copied it below to make it easier. Also, check out her awesome pictures because they're much more appetizing than mine!


Ingredients:
1 lb. pasta shapes *I used whole grain shells
1 lb. raw shrimp (31-40 ct.), peeled and deveined, cut in half (if desired)
10 oz. feta cheese, crumbled and divided
Zest of 1 lemon, divided
½ cup Panko breadcrumbs
2 tbsp. fresh parsley, chopped, divided
5 tbsp. butter, divided
4 tbsp. all-purpose flour
3 cups milk *I used organic skim
2 tbsp. fresh dill, chopped
8 oz. Gruyere cheese, shredded (about 2 cups)
½ tsp. kosher salt
½ tsp. ground black pepper
Directions:
Bring a large pot of salted water to boil.  Cook the pasta until al dente according to the package directions.  Drain well; set aside.  Add the raw shrimp to the warm pasta and toss together.  The heat from the pasta will partially cook the shrimp.
Meanwhile, preheat the oven to 400˚ F.  In a small bowl, combine a handful of the feta, a pinch of the lemon zest, the panko, 2 teaspoons of the parsley and 1 tablespoon of the butter, melted.  Toss with a fork to combine; set aside.
In a medium saucepan, melt the remaining 4 tablespoons of butter over medium-high heat.  Once the butter is melted, whisk in the flour  to form a paste.  Cook 1-2 minutes, whisking constantly, until light golden brown.  Whisk in the milk.  Continue to heat the mixture, stirring frequently, until it bubbles and thickens, about 5 minutes.  As soon as the sauce has thickened, remove from the heat and stir in the remaining feta, Gruyere, remaining parsley, remaining lemon zest, dill, salt and pepper.  Pour the mixture over the pasta and shrimp; toss well to coat.
Transfer the mixture to a lightly greased 2½ or 3-quart baking dish.  Sprinkle the breadcrumb-feta mixture evenly over the top.  Bake for 20-25 minutes, until lightly browned and bubbling.  Remove from the oven and let cool 5-10 minutes before serving.

Let me know what you think!